
At Schutt Log Homes and Millworks we get a lot of questions about chinking.
I’m going to take you through the process and hopefully give a few tips and tricks along the way. Although it’s not for everyone, chinking is one of my favorite things to do. Just remember don’t get in a hurry, you want a great looking finished project, so take your time and perfect your technic and you will cruise through it.
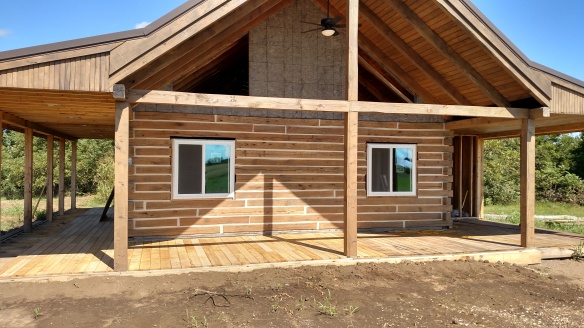
Chinking is a very important part of the construction of our Oak log home kits. The chinking is basically the glue that holds it all together. (Not really, we recommend Timber lock screws every 3 feet to hold the walls in place). But the chinking is still way up on the list of most important elements of the log cabin structure.
There are many types and manufactures of chinking out there. We have a few we recommend on our website. We find the best product is one that remains somewhat pliable after application. This will allow for the shrinking and expanding of the logs without tearing the chinking as time goes by.
The process of chinking is rather simple. But it is time-consuming and must be done correctly to achieve the desired look and properly seal the spaces between the logs used in the walls. Once the technic is perfected the process speeds up quite a bit. As I said the process is simple but takes a little time to master. Don’t worry, while you’re building your log home you will get lots of practice chinking. You will be an expert by the end of your project.
I have never used the caulk gun method. Some people really like chinking this way and say it’s much faster. The steps will be the same other than you won’t need to fill the spaces with a putty knife, you will use the caulk gun to do it.
The materials you will need to get started are:
- Backer rod- this is a roll of round foam used to fill the chamfered space under the chinking. This creates a better air barrier and reduces the amount of chinking you will use.
- Chinking- usually a five-gallon bucket. Note keep the lid on the bucket as much as possible to prevent the chinking from drying out.
- A small pallet (a Piece of scrap wood works great) about 12” x 12” to put chinking on. This makes it easier to walk down the wall and allows the lid to stay on the large bucket to keep the chinking from drying out.
- Masking tape- The cheapest you can buy. You will be using a lot of tape.
- Paintbrush- 1” or 2”
- A container of water- something like a large disposable cup or bowl.
- Clean cloth to wipe down the wall and clean up any oops.
- Putty knife- I use the cheap plastic ones. They are flexible but not too flexible.
- If the floors are finished place something on the floors in the event you drop chink. Cardboard or trash bags work well.
- Trash bag or bucket to put the used tape in. Buckets work best for the tape
So, let’s get started learning how to chink. I will try to keep it simple and make the process clear.
- The first thing I do is turn on my favorite music or audiobook. Then pick where you want to start. I recommend in a closet or where cabinets will go, this way it will be hidden if you make a mistake.
- Wipe the wall to clear off any dust.
- Pack the backer rod in the back of the V-space created by chamfering. Try to get it as tight as possible and be sure none of the backer rod is protruding beyond the edge of the log. It will show through the chink.
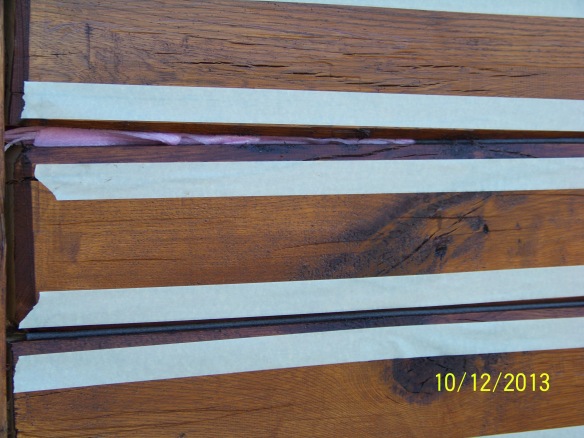
- Use the masking tape on the flat side (the side facing you) of the chamfered edge of the log. The tape will keep the chinking off the wall where you don’t want it. This part of the process takes some time to perfect. Try to follow the chamfered line closely. It will not be a perfectly straight line which is perfectly fine. The varying chink line adds to the personality of the cabin.
- Only tape as much wall as you will finish in a couple hours. If you leave the tape on the wall longer than an hour or two the tape will be difficult to remove. You will get very frustrated.

- Only tape as much wall as you will finish in a couple hours. If you leave the tape on the wall longer than an hour or two the tape will be difficult to remove. You will get very frustrated.
- Use the putty knife to take a few big scoops of chinking out of the bucket and put it on your Pallet.
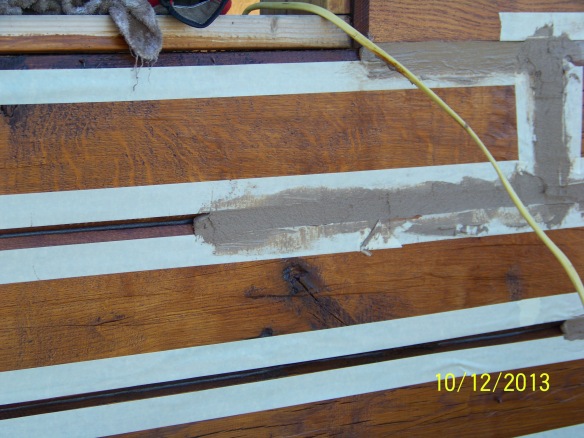
- Fill the chamfered space on the wall using the putty knife. Be sure to push the chinking into the V-space. Use the putty knife to scrape excess chinking to make it even with the log wall. Your lines will not be perfect

- Wet the paintbrush with water. Use the paintbrush to lightly brush the chinking in one direction. This step will smooth the chinking and make the edges blend.
- Wait about 5-10 minutes. Do NOT let the chinking dry before you pull the tape. It will be a mess!
- Pull the tape being careful not to touch the chinking line.
- If you do damage the fresh chinking use your wet paintbrush or wet your finger and smooth it out.
- Wipe any runs off the wall.

There you have it. Simple, right?
Some important tips to remember are:
- Don’t let your chinking dry out.
- Don’t leave the tape on the wall very long.
- After you apply the chink do not let the chinking dry before you remove the tape.
- Wipe the runs off the wall as soon as possible.
- If you don’t finish a complete line taper the chinking down so when you continue the joint will be blended and not visible.
LWS
